首页
代码
导航
问答
关于
开始创作
综合资讯
程序设计
安卓开发
前端开发
IOS开发
数据库
开发日志
应用推荐
每日一站
推荐
最新
JavaScript 异步编程
剑指前端
相关问题 JavaScript 异步编程方案有哪些 JavaScript 异步编程方案各有什么优缺点 回答关键点 阻塞 事件循环 回调函数 JavaScript 是
2022-02-10 1476 浏览 · 0 点赞
New 操作符的原理
剑指前端
相关问题 new 操作符做了什么 new 操作符的模拟实现 回答关键点 构造函数 对象实例 new 操作符通过执行自定义构造函数或内置对象构造函数,生成对应的对象实
2022-02-10 878 浏览 · 0 点赞
ES5、ES6 如何实现继承
剑指前端
相关问题 关于 ES5 和 ES6 的继承问题 原型链概念 回答关键点 原型链继承 构造函数继承 ES6 类继承 继承是指子类型具备父类型的属性和行为,使代码得以复
2022-02-10 959 浏览 · 0 点赞
前端模块化规范
剑指前端
相关问题 JavaScript 主要有哪几种模块化规范 AMD / CMD 有什么异同 ESM 是什么 模块化解决了什么问题/痛点 回答关键点 Common
2022-02-10 905 浏览 · 0 点赞
闭包的作用和原理
剑指前端
相关问题 什么是闭包 闭包的应用 回答关键点 作用域 引用 函数 作用:能够在函数定义的作用域外,使用函数定义作用域内的局部变量,并且不会污染全局。 原理:基于词法
2022-02-10 940 浏览 · 0 点赞
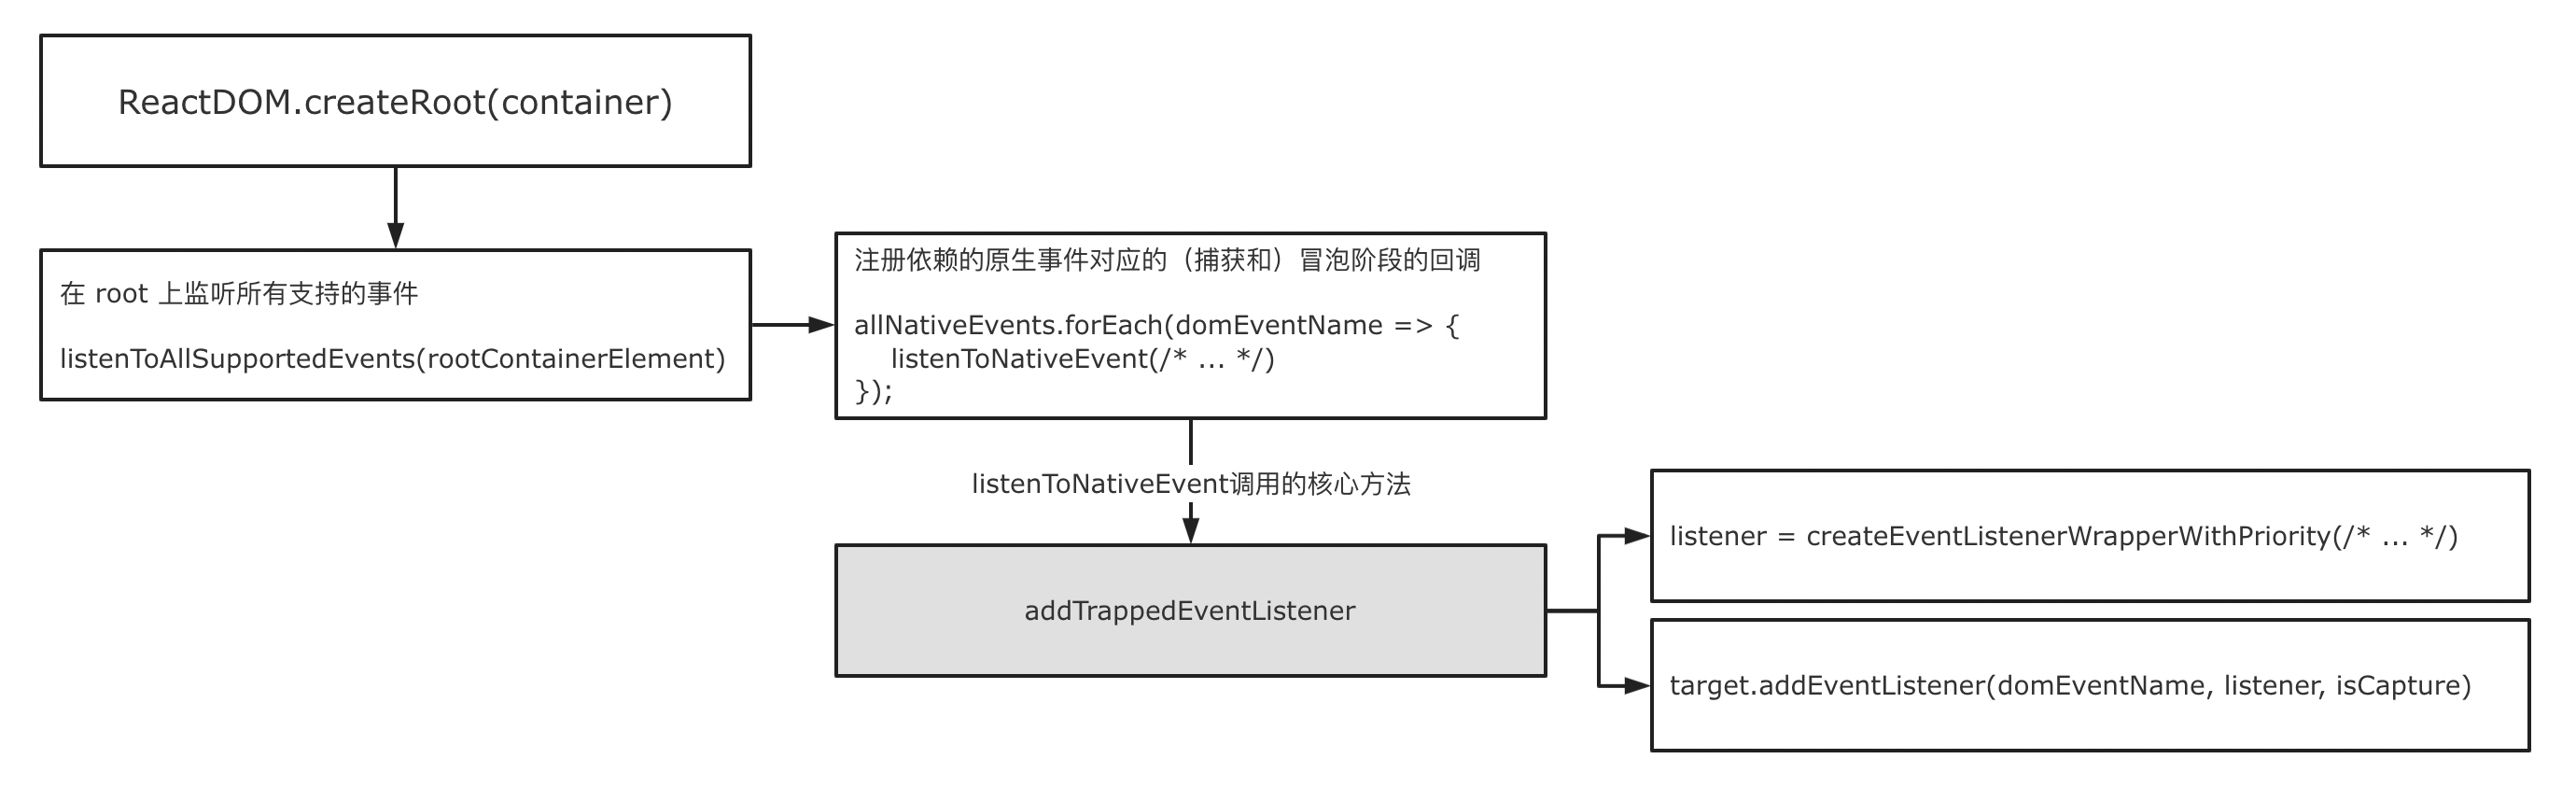
React 事件机制原理
剑指前端
相关问题 React 合成事件与原生 DOM 事件的区别 React 如何注册和触发事件 React 事件如何解决浏览器兼容问题 回答关键点 React 的事件
2022-02-10 866 浏览 · 0 点赞
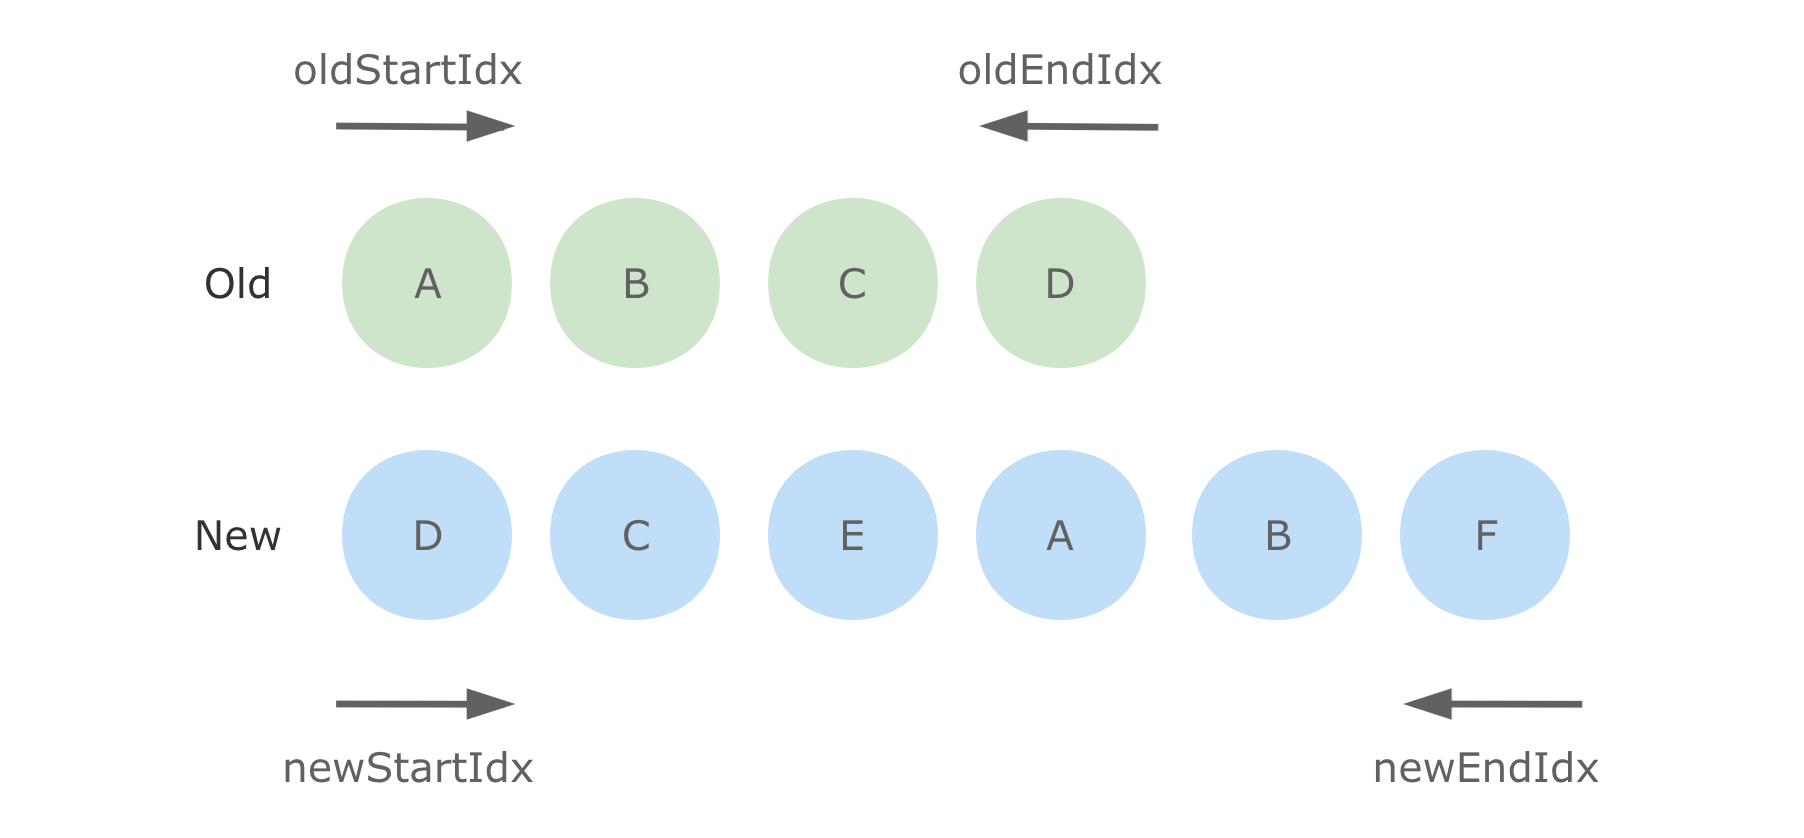
常见框架的 Diff 算法
剑指前端
相关问题 虚拟 DOM 是什么 虚拟 DOM 的作用 讲一下 Vue 的 Diff 算法 回答关键点 虚拟 DOM 时间复杂度O(n) 现代网站大多具有复杂布局
2022-02-10 930 浏览 · 0 点赞
React Hooks 实现原理
剑指前端
相关问题 React Hooks 是什么 React Hooks 是怎么实现的 使用 React Hooks 需要注意什么 回答关键点 闭包 Fiber 链表
2022-02-10 935 浏览 · 0 点赞
HOC vs Render Props vs Hooks
剑指前端
相关问题 什么是 HOC / Render Props / Hooks 为什么需要 HOC / Render Props / Hooks 如何提高代码复用性 H
2022-02-10 1296 浏览 · 0 点赞
查看更多
泡网热榜
本周
本月
总排行
随机推荐
1
Linux 下载
2
CentOS 7.4 (1708)
3
试试Linux下的ip命令,ifconfig已经过时了
4
新手指南: 手把手教你安装 Ubuntu 和 Fedora
5
在 Linux 下用 mkdir 命令来创建目录和子目录
6
Linux中国——关于我们
7
android:ToolBar详解(手把手教程)
推荐专题
更多 >
浏览器 | 剑指前端
UI实验室
布局动画LayoutAnimation
官方ORM框架Room
设置(Settings)
最近随笔
更多 >
尹贻浩
最近有了一点时间处理事情,陪亲戚家小孩玩耍时,她想玩我的手机,帮她打开了抖音,她说不喜欢,喜欢小红书,诧异了一下,又觉得也合理,问为什么,她
0
0
aiheshayu
我们自己开发代码托管服务,用了两年了,用于内部替代 Github,免费开源给大家使用
0
0
aiheshayu
我们自己开发代码托管服务,用了两年了,用于内部替代 Github,免费开源给大家使用
0
0
aiheshayu
我们自己开发代码托管服务,用了两年了,用于内部替代 Github,免费开源给大家使用
0
0
最新问答
更多 >
小猴
Android终端机器出现「分配CPU内存失败」错误
西西
var和const有区别吗
泡在网上的日子
图片能上传了吗?
泡在网上的日子
Activity中含有Fragment后可以从onPause()返回到onResuem()吗?